Setting Up WinCDS
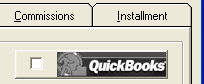
The first step you must do to set up your QuickBooks interface is to enable it in Store Setup.Open store setup and go to the options tab. You should see a grayed out QuickBooks box with no check-mark.
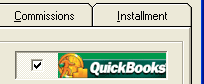
Click on this check-box and it will become checked and colored in as such:
This will indicate to WinCDS that you desire to use QuickBooks for your accounting, but WinCDS must know the file name, the accounts, and setup other important information before you can begin using it.
Setting up the QuickBooks Company
The second step in setting up your QuickBooks interface is to be sure that your QuickBooks company file will accept connections from WinCDS. To enable this, follow these steps:- Open your QuickBooks company.
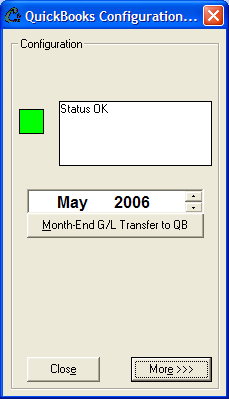
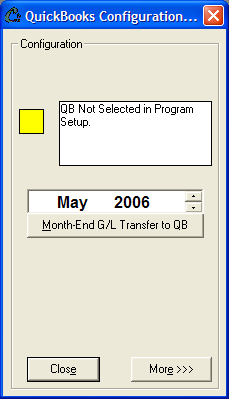
- In WinCDS, open the QuickBooks Interface panel from the General Ledger Menu. You should see the following:
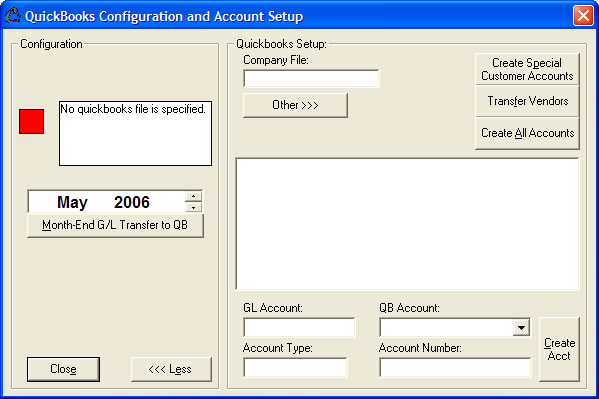
- You must now specify for WinCDS to connect to your QuickBooks company. Enter the filename of
your company datafile into the box labeled Company File. Tab off this box and you will
receive notification that WinCDS is attempting to connect to your Company File.
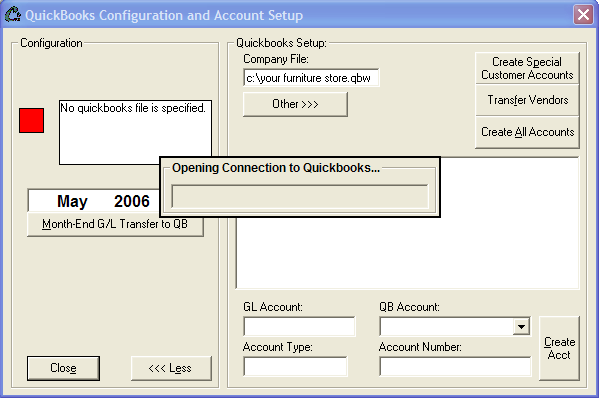
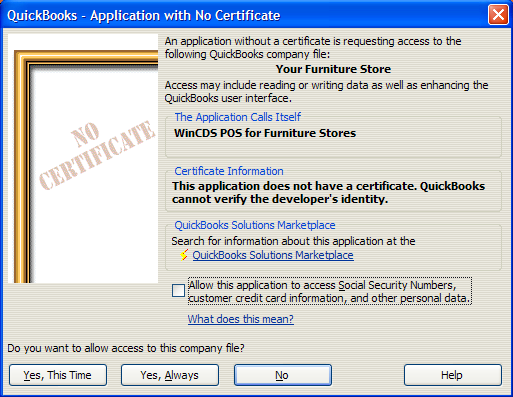
- Once you see the connecting message, QuickBooks should respond with a security warning. This
indicates that it has detected a program attempting to connect to its data file. Verify your company
name and that the application attempting to access the file is called
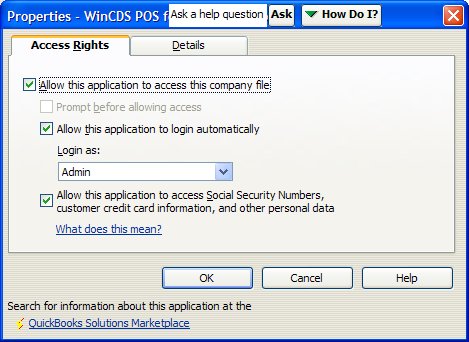
WinCDS POS for Furniture Stores. Enable the checkbox at the bottom of the box that
says Allow this application to access Social Security Numbers, customer credit card information,
and other personal data. Then, click Yes, Always to allow WinCDS to access your data.
-
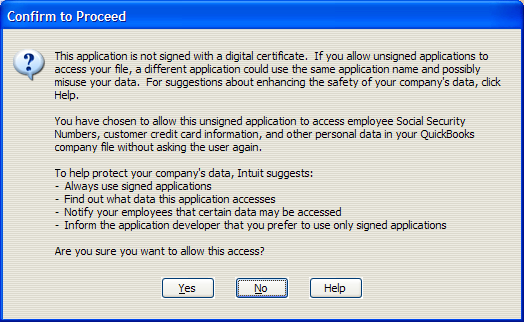
When you click to accept, you will be asked to confirm your choice to proceed.
NOTE: If you do not authorize WinCDs to access
your data, we will not have access to interface our accounting with your company file.
Be sure to read the notice and click Yes to proceed.
-
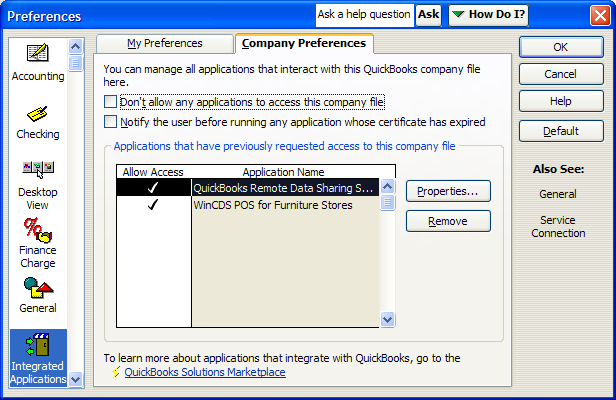
Now you must finish setting up the options for this application. Go to the Edit menu in QuickBooks
and select Preferences. On the left of the form, scroll to and select Integrated Applications
and go to the Company Preferences tab. This shows you the complete list of applications
that are allowed to integrate with your company's data. If you have successfully carried out the
above instructions, you should see the entry WinCDS POS for Furniture Stores in the list. Select
this entry and click on the Properties... button to the right of the list.
- In order for WinCDS to access the data without having QuickBooks open in the background, it must be
given permission by you to login automatically. Click the box labled Allow this application to login
automatically. Click OK to exit out of the properties, and again to exit the Preferences screen/
Integrated Applications list.
- Your QuickBooks company is now set up to allow WinCDS to connect freely!
Creating Location Classes
WinCDS will export all of its data with classes that reflect the store number. Click the Create Loc Classes to allow WinCDS to create these classes automatically.Creating special customers
WinCDS uses a dummy customer called 'Customer Deposits' for tracking bank deposits. Click Create Special Customer Accounts to create this account automatically.Transfering Vendors
Generally, you will have all of your vendors already set up in QuickBooks. If this is the case, you can skip this step. WinCDS needs all of its vendors to exist in QuickBooks. If you do not have the vendors existing in QuickBooks, you can click on Transfer Vendors to automatically transfer all of your vendors.Setting up your Account Mapping
To set up a single account, select it from the list. Below, you will see the account name, number, and type. Either select an existing QuickBooks account from the drop-down box or a new account. If you want to create a new account, you can also specify an account number. You must click Create Acct. If the account already exists, simply tab off your selection.Do this for all the accounts specified.
>>> Click here for a full list of accounts that WinCDs must map.
Alternatively, Click on Create All Accounts to automatically create all the required accounts. Note that each transaction to QuickBooks may take a while, so this operation could take a minute or two. Wait until you are notified that the process is complete.
Confirming your QB Setup
To confirm that your QuickBooks interface is properly setup, open the Interface panel (from the General Ledger drop down on the Main Menu). You should see a green status indicator and a status message indicating Status OK.